CH-47
Chinook
Engine
Pod Assembly Notes
Following are notes
to aid in trimming, assembly and installation of the CH-47 engine
pods.
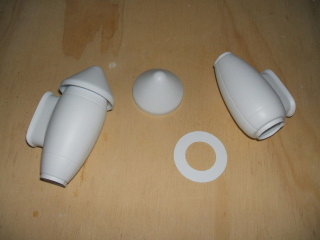
1. Fabricating the Engine
Exhaust Pipes and
Filter Washers: The engine exhaust pipes are cut from .020"
styrene or cardstock, rolled to shape and glued at the tabs.
They'll have
a neater appearance if you block sand the edges at the overlapping
seams to a
tapered edge. Make two .020 styrene or cardstock "washers" for
mounting the cone-shaped filter housings on the front of the engine
pods.
These washers should have an inside diameter of 0.92" and an outside
diameter of 1.57".
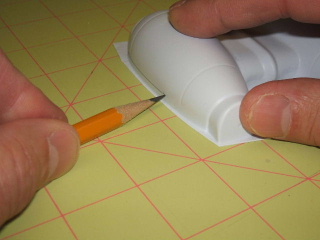
2. Trimming the Engine Pods: To
mark the engine pod halves and filter housings for trimming, place each
part on
a flat surface and lay a pencil flat on the surface as well. Trace around the parts
to leave a pencil line 1/8" above the work surface.
Use a shim under the pencil if necessary to
make the line the proper distance above the surface.
Carefully trim the parts using sharp scissors
or aviation snips and lightly sand the edges.
|
|
To assemble the
pods, note that
the pod halves should overlap each other by about 1/16". Use the
washers and exhaust pipes to help align the shells together and then
lightly
tack glue the halves. Note that the exhaust pipes are designed to
angle
outward slightly as shown on the top view of the plans. Only when
you're
certain of the alignment you should permanently glue the seams.
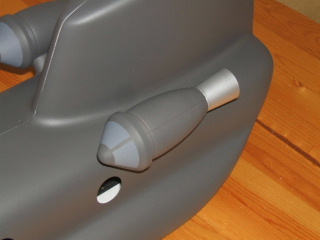
3. Final Engine Assembly: The
intake filter cones are glued over the washers to complete the engine
assembly. I recommend mounting the engine pods on the body with
small
rare earth magnets so that they'll pop off if they snag on something or
if you
have a hard landing. To do this, I cut an
oval of 1/8" balsa to fit in the base of each pod pylon and then inset
rare
earth magnets into this base. The pods
can be pressed up against the body and the second pair of magnets
placed inside
the shell to stick to their mates. Move
the pods to their proper location and then glue the magnets inside the
body
shell.
 |
 |
Body Assembly Notes: Click here for assembly notes for the body shells.